
Why Choosing the Right Milk Matters
A consumer living in Leeds, UK, purchased a yogurt maker for the first time, followed the operating instructions step by step, and still ended up with a watery, separated batch that barely resembled yogurt. This isn’t an unusual story. Plenty of people trying homemade yogurt for the first time experience the same problem, and most assume the machine or the starter culture is to blame. In reality, choosing the best milk for homemade yogurt often has a far greater impact on the final result than many beginners realise.
How Milk Protein Affects Homemade Yogurt
After looking closely at the variables involved, the best milk for homemade yogurt turns out to be the single largest factor affecting the final texture, well ahead of fermentation time, starter quality, or the specific yogurt maker used. The science behind this is straightforward. Casein, the primary protein in milk, forms a gel structure as lactic acid bacteria break down lactose and produce acid. Fat contributes to creaminess and mouthfeel, but it isn’t what holds the yogurt together. Protein provides the structure, and milk with lower protein levels will produce thin yogurt regardless of how much fat it contains.
Does Higher Fat Make Better Homemade Yogurt?
This also corrects the common misconception that higher fat automatically produces thicker yogurt. It doesn’t. Some full-fat, grass-fed milks contain comparatively less protein than expected, meaning they can still produce a loose, disappointing set even when every other step in the yogurt-making process has been followed correctly. Understanding this is essential when selecting the best milk for homemade yogurt.
It’s worth understanding why this misconception is so widespread. Marketing for dairy products often focuses on fat content, comparing whole milk with skimmed milk or full-fat yogurt with reduced-fat varieties. Many people naturally assume the same principle applies when making yogurt at home. However, yogurt is not thickened by fat alone. The body and texture comes from a network of milk proteins formed during fermentation, not from the fat content. Confusing these two factors is one of the main reasons people fail to choose the best milk for homemade yogurt on their first attempt.
Can Seasonal Changes Affect Homemade Yogurt?
There’s another factor that many people overlook. The protein and fat content of milk can vary slightly throughout the year depending on what dairy cows are fed, particularly on grass-fed farms where seasonal diets influence milk composition. As a result, a carton of whole milk purchased in early spring may produce a slightly different texture from one bought in late autumn, even if the label looks identical. Most home yogurt makers don’t need to monitor these seasonal changes closely, but understanding them helps explain why two batches made with the best milk for homemade yogurt can still have subtle differences in consistency
Comparing the Best Milk Types for Homemade Yogurt
Using a standard 24-hour fermentation period as a fixed reference point, here’s how seven commonly available milk bases compare on final texture, tang, and practical notes.
| Milk Base | Final Texture | Tang Level | Practical Notes |
|---|---|---|---|
| Whole milk | Thick, creamy, consistent | Moderate | The reliable default for most home batches |
| 2% low-fat milk | Slightly thinner, still sets | Moderate | A reasonable middle ground |
| Skim milk | Thin, occasionally grainy | Mild | Needs added milk powder to firm up |
| Goat milk | Softer curd, faster set | Strong | Benefits from blending with cow’s milk |
| Raw milk | Unpredictable | Varies | Restricted in many regions, real safety concerns |
| UHT (ultra-high temperature) milk | Frequently won’t set at all | N/A | Proteins are already damaged by processing |
| Plant milk (oat, soy, almond) | Requires added thickener | Varies | Soy behaves closest to dairy on its own |
Raw milk deserves a direct caution rather than a passing mention. Beyond the legal restrictions that apply in many regions, raw milk carries a genuine risk of harmful bacteria that home fermentation temperatures aren’t reliable enough to eliminate. The texture argument in raw milk’s favor doesn’t outweigh that risk for most home kitchens.
Why Homemade Yogurt Fails and How to Avoid It
Avoid Using UHT Milk for Homemade Yogurt
The single most common reason first-time batches fail is surprisingly easy to fix: using UHT (Ultra-High Temperature) milk, the type commonly sold at room temperature with a shelf life of several months. The intense heat used during UHT processing changes the milk proteins so significantly that they struggle to form the strong gel structure needed for thick, creamy yogurt. As a result, even a high-quality starter culture and perfect fermentation time may still produce disappointing results.
The solution is simple. Choose regular pasteurised milk from the refrigerated dairy section instead of shelf-stable cartons whenever possible. Before buying milk, check the label for terms such as “UHT” or “ultra-pasteurised,” as manufacturers process some whole milk products this way even though they look like standard refrigerated milk. Selecting the best milk for homemade yogurt from the start greatly improves your chances of producing a thick, well-set batch.
Prevent Temperature Shock When Adding the Starter Culture
Another common mistake happens before fermentation even begins. Pouring cold milk directly into a warm starter culture, or adding the starter before the milk has reached the correct temperature, can reduce the activity of the beneficial bacteria. This temperature shock weakens the starter culture and often results in yogurt that is thin, watery, and less flavourful than expected.
To avoid this problem, always allow the milk to reach the recommended temperature before adding the starter culture. Using a kitchen thermometer rather than estimating by touch helps protect the live cultures and encourages consistent fermentation. This simple step, together with choosing the best milk for homemade yogurt, can make a significant difference to the final texture and quality of your homemade yogurt.
You can learn more about live yoghurt cultures and fermented foods from trusted nutrition resources.
How Fermentation Temperature Affects Homemade Yogurt
Milk selection doesn’t operate in isolation from temperature and timing, and it helps to understand how the two variables intersect. Lactic acid bacteria have a preferred temperature range, generally between 108°F and 112°F, where they multiply efficiently without dying off from excess heat. The high-heat processing used to produce UHT milk permanently alters its proteins, so longer fermentation cannot restore their ability to form a stable gel. High-heat processing compromises the protein structure before you add the starter culture, so extending the fermentation time cannot fix the problem.

For milk that’s properly prepped, though, temperature consistency matters more than most people expect. A batch held at a stable 110°F for 8 hours can produce a milder, less tangy yogurt, while the same milk held for a full 24 hours at that same temperature develops a noticeably stronger tang as the bacteria continue converting lactose into lactic acid. This is one of the reasons dedicated yogurt makers tend to outperform improvised setups like an oven with the light on or a cooler filled with warm water. Consistent temperature over a long stretch, rather than a brief warm spike, is what actually drives flavor development.
Goat milk is a partial exception here. Its protein structure ferments somewhat faster than cow’s milk, so a full 24-hour cycle at standard temperature can sometimes over-ferment it, producing a sharper tang than intended. Checking a goat milk batch at the 16 to 18 hour mark, rather than waiting the full 24 hours, often produces a more balanced result.
Module One: How to Make Thick Greek-Style Yogurt Without Special Equipment
A thick, creamy, Greek-style result is achievable without buying any specialized gear, and the method comes down to boosting protein rather than fat. dtdf home and kitchen, which tests home food production methods and equipment, ran this exact approach, whole milk combined with a light straining step, across multiple mainstream yogurt maker models, and the results held steady across every test.
The quantified version of the method looks like this:
- Add 2 to 3 tablespoons of milk powder per quart of milk before heating, which boosts protein content without altering the flavor.
- Heat the milk to 180°F first. This step sterilizes the milk and firms up the eventual texture by denaturing just enough protein.
- Let the milk cool down fully before adding the starter culture. Adding starter to hot milk kills the bacteria outright.
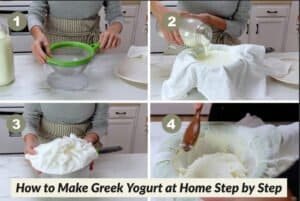
- Strain the finished yogurt through cheesecloth or a fine mesh strainer for an hour or two to remove excess whey, which is the real method behind commercial “Greek” yogurt.
- Reuse the same starter culture no more than 5 to 6 times before switching to a fresh one, since the culture noticeably weakens beyond that point.
- Keep total fermentation time within 24 hours for a standard batch, adjusting slightly longer only for a tangier result.
Anyone using one of the best yogurt makers for probiotic-rich snacks still needs to complete this preheating and straining process manually. These machines are built to hold a consistent fermentation temperature, not to correct for milk that wasn’t prepared properly beforehand, so skipping the prep step tends to produce the same disappointing result regardless of how good the machine is.
Module Two: How to Make Homemade Yogurt with Plant-Based Milk
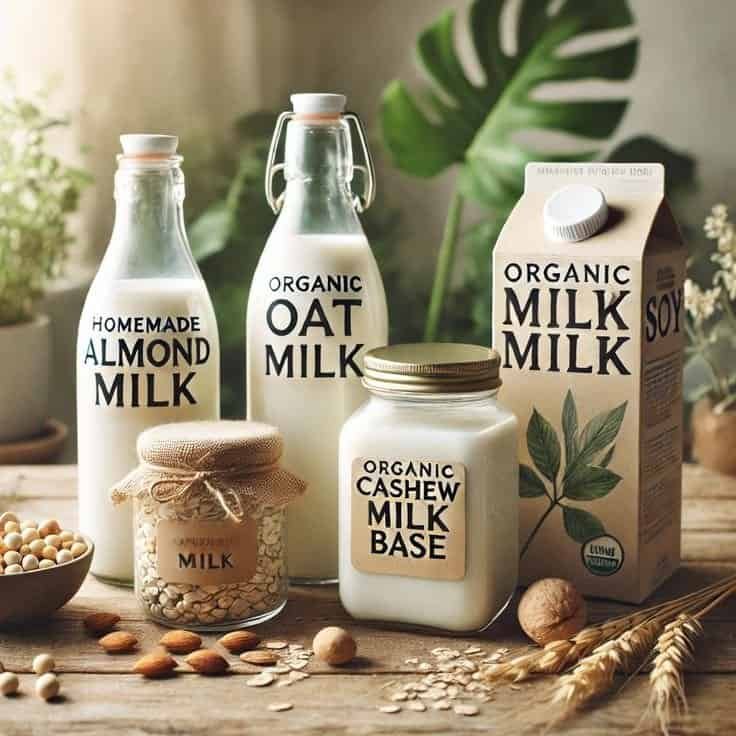
Vegan and dairy-free users need a different approach, since plant milks lack casein entirely and can’t rely on the same protein-driven gel structure. Prioritize homemade plant-based milk over diluted commercial cartons because manufacturers formulate most store-bought plant milks for drinking rather than culturing, and that dilution often produces noticeably thinner yogurt.
Each plant milk base behaves differently, and treating them all the same is a common mistake:
- Soy milk can form a gel somewhat naturally, since it retains a protein structure closer to dairy than other plant bases, though the texture ends up softer overall.
- Oat milk requires an added thickener, typically agar-agar or tapioca starch, mixed in before culturing begins.
- Almond milk needs the same kind of stabilizer as oat milk, and without it, the batch tends to separate rather than set.
- Coconut milk needs additional stabilizers beyond what oat or almond milk require, and it’s generally the trickiest of the common plant bases to get right on a first attempt.
Anyone building a consistent dairy-free routine around this might get more reliable results by making the base milk fresh rather than relying on cartons formulated for drinking. The nut milk makers for dairy-free drinks roundup covers machines built specifically for producing a base concentrated enough to hold up through fermentation.
Module Three: Five Common Mistakes to Avoid When Making Homemade Yogurt
Pulling everything together, five mistakes account for most failed homemade yogurt batches, and all of them are avoidable once they’re recognized:
- Mixing cold milk directly with a warm starter culture, which kills off active probiotics before fermentation really begins.
- Using UHT or ultra-pasteurized milk, whose proteins are already too damaged from processing to form a proper gel.
- Assuming that high-fat milk automatically produces thick yogurt, when protein content is actually the determining factor.
- Reusing the same starter culture well beyond the recommended 5 to 6 batch limit, which produces a progressively weaker set and thinner flavor.
- Skipping the preheating step, even when using a dedicated yogurt maker, since these machines maintain temperature but don’t fix milk that wasn’t prepared correctly beforehand.
For readers who use sous vide equipment to hold a precise, low-temperature environment during fermentation, this approach works well since consistency matters more than hitting an exact number. The best sous vide machines guide covers models capable of holding a steady temperature through a full 24-hour ferment, which suits this kind of use case better than machines built primarily for cooking proteins.
This guide helps a wide range of readers, including home food enthusiasts experimenting for the first time, yogurt maker owners troubleshooting specific machines, vegan users adapting recipes for plant-based milk, and sous vide owners repurposing equipment they already have. We explain the reason behind every recommendation so you can apply the same principles when using different types of milk or different equipment.
How to Store Homemade Yogurt for Maximum Freshness
How Milk Choice Affects Homemade Yogurt Shelf Life
The milk you choose at the beginning of the yogurt-making process can have a significant impact on how well the finished yogurt keeps in the refrigerator. Yogurt made from whole milk with a properly prepared protein base generally remains fresh and stable for 10 to 14 days when stored at a consistent refrigerated temperature. During this time, the flavour may gradually become tangier as the live cultures continue to work.
By contrast, yogurt made with lower-protein milk or milk that was not heated and cooled correctly before fermentation is more likely to separate during storage. In some cases, whey may begin to separate within just a few days, even if the yogurt initially appeared thick and well set.
How to Tell If Homemade Yogurt Is Still Safe to Eat
A layer of whey on top of stored homemade yogurt is completely normal and does not mean the yogurt has spoiled. Simply stir the whey back into the yogurt before serving to restore a smooth consistency
However, signs such as a sour or unpleasant smell, visible mould, or unusual discolouration indicate that the yogurt should be discarded immediately. To help preserve freshness and prevent odour absorption, store homemade yogurt in airtight glass containers whenever possible, especially if you plan to keep it for up to two weeks.
Does Greek-Style Yogurt Last Longer Than Regular Homemade Yogurt?
Straining homemade yogurt to create a thicker Greek-style consistency can also help extend its practical shelf life. Removing excess whey reduces the amount of liquid in which bacteria remain active, helping the yogurt maintain its texture for longer.
When properly strained and refrigerated, Greek-style yogurt often stays thicker and more stable for several extra days compared with an unstrained batch made from the same milk. This makes it an excellent option for anyone preparing larger batches of homemade yogurt in advance.
Why Choosing the Right Milk for Homemade Yogurt Matters
You must choose the right milk before fermentation begins because you cannot change that decision after adding the starter culture. You can sometimes improve a weak batch by straining it, but you cannot restore a batch that never sets properly because high-heat processing has already compromised the milk’s protein structure.
Frequently Asked Questions
Can You Make Yogurt with Lactose-Free Milk?
Yes. The only real difference is that there’s less lactose available for the bacteria to consume, which produces a milder tang and can require a longer fermentation window. As long as you avoid UHT-processed milk, you should achieve the expected texture.
Does Organic Milk Make Better Yogurt?
Not inherently. Organic certification doesn’t determine protein or fat content, and the sterilization method used has a far greater effect on whether yogurt sets properly than organic status does. Some organic brands happen to use gentler pasteurization, so it’s worth checking the label regardless of the organic claim.
Why did a batch made with whole milk still turn out thin?
Three factors usually cause this problem: using a weak or expired starter culture, allowing insufficient fermentation time, or choosing whole milk that manufacturers processed using UHT methods. You can often improve an overly thin batch by straining it through cheesecloth.
Is it safe to use milk that’s a few days from its expiration date?
Yes, as long as it hasn’t turned sour and has no unusual odor. Milk develops slightly higher acidity during a short period of refrigeration, which can help the yogurt set more firmly than fresh milk.
Can you blend whole milk and goat milk in one batch?
Yes, and it’s a reasonable approach. Blending the two neutralizes some of the strong tang from pure goat milk while retaining its faster fermentation characteristics. The ratio can be adjusted toward more or less goat milk depending on personal taste.
Does the brand of milk actually matter, or just the type?
Type matters more than brand in most cases. Two whole milk cartons from different brands, both regular pasteurized rather than UHT, should behave similarly. Ultra-filtered milk contains added protein, which can produce a firmer set than standard whole milk. In contrast, milk containing added stabilisers or gums can interfere with clean fermentation.
Is it worth buying milk specifically marketed for yogurt-making?
Some brands do sell milk marketed this way, usually ultra-filtered or with added milk solids, and it can produce a noticeably thicker result without any extra prep work. It’s a reasonable shortcut for anyone who wants consistent results without adding milk powder manually, though it typically costs more than standard whole milk.
For readers ready to invest in dedicated equipment, the 5 Best Yogurt Makers roundup from dtdf home and kitchen breaks down how different machines perform with both whole milk and non-dairy bases, based on the same testing approach referenced throughout this guide.