
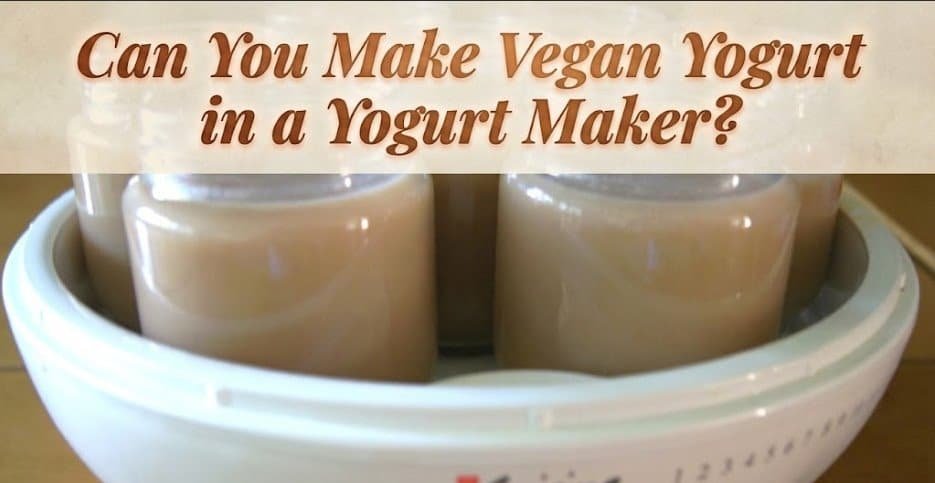
Can you make vegan yogurt in a yogurt maker? The answer is yes. A standard household yogurt maker, even one designed with dairy yogurt in mind, works perfectly well for plant-based batches. The appliance’s only real job is maintaining a steady temperature for several hours it doesn’t care what kind of milk is inside.Prepare the milk carefully, add the right ingredients, and ferment it for the appropriate amount of time to achieve the best results. Skip these adjustments, and a plant-based batch is much more likely to fail in ways that a dairy batch usually would not.
Why Plant Milk Ferments Differently Than Dairy
Dairy milk contains two things that make fermentation almost foolproof: lactose, a sugar the yogurt cultures feed on, and casein, a protein that coagulates as the culture works, giving yogurt its structure. Plant milks don’t have either in a form the cultures can use the same way, which is why a straight swap same recipe, same timing, just different milk usually produces something closer to sour, watery milk than yogurt.

Choosing the Best Plant-Based Milk for Vegan Yogurt
Soy milk is the closest exception. Its protein content is high enough, and similar enough in structure to dairy casein, that it can set almost like traditional yogurt without much intervention. That’s why nearly every beginner-friendly vegan yogurt recipe recommends soy milk as the easiest starting point.
Coconut, oat, cashew and almond milk sit much further from dairy in terms of protein content, sometimes dramatically so. Almond milk provides very little protein for yogurt cultures because it contains mostly water and only a small amount of ground almonds. If you’re wondering can you make vegan yogurt in a yogurt maker using these plant-based milks, the answer is still yes, but they usually require a thickener to provide the structure that protein would otherwise create.
The nutritional profile of each plant-based milk varies considerably, particularly its protein content. According to the USDA FoodData Central, soy milk generally contains more protein than almond or rice milk, making it a popular choice for homemade vegan yogurt.
How a Yogurt Maker Ferments Plant-Based Milk
None of this changes what the yogurt maker itself is doing. It’s simply a temperature-controlled appliance, typically maintaining between 100°F and 115°F (38°C to 46°C), which is the ideal range for most yogurt cultures to multiply efficiently. Whether you’re asking can you make vegan yogurt in a yogurt maker with soy, oat or coconut milk, the machine performs exactly the same function. The difference lies in the chemistry taking place inside the jars, not in the appliance itself.
It also helps to understand what’s happening at the microbial level, as this explains why many troubleshooting tips are so important. Yogurt cultures typically contain a blend of Lactobacillus and Streptococcus bacteria, which require warmth, a suitable food source and minimal competition from unwanted microbes. Dairy milk naturally provides these conditions, while plant-based milk often requires a little more preparation. If you’re exploring can you make vegan yogurt in a yogurt maker, proper sterilisation of the jars and utensils is one of the most important steps, as it helps prevent unwanted bacteria from interfering with the fermentation process.
Proper hygiene is essential when fermenting yogurt at home. The NHS food safety guidance recommends keeping equipment clean to reduce the risk of unwanted bacterial contamination during food preparation.
What You’ll Actually Need
The equipment list is short, and nothing on it requires specialty sourcing:
- Unsweetened plant milk soy for the simplest results, or coconut/oat/cashew/almond if you want a different flavor profile
- A vegan-compatible yogurt starter culture, or two to three tablespoons of an existing store-bought vegan yogurt with live active cultures
- A thickener, if you’re not using soy agar agar or tapioca starch, at roughly 1 to 2 teaspoons per quart of milk
- A thermometer, since plant milk scorches faster than dairy over direct heat
- Your yogurt maker and its jars
This is also where the most common early mistake happens, and it’s worth calling out directly: skipping the pre-heat step and pouring room-temperature plant milk straight into the maker with the starter added. Dairy milk gives you a small advantage because pasteurisation greatly reduces competing bacteria before you add the starter culture. Plant milk is not the same. Skipping the heat step lets whatever native bacteria are already present in the milk get a head start on the yogurt culture, and the result is usually a spoiled, sour-smelling batch rather than yogurt.
Freshly made nut or oat milk contains a different bacterial load because it hasn’t gone through the commercial pasteurisation process used for shelf-stable carton milk. Homemade plant milk needs the pre-heat step even more reliably than store-bought, since it hasn’t been through any prior heat treatment at all.
The Step-by-Step Process
Heat the milk. Bring your plant milk to roughly 180°F if you’re using a thickener this is what activates agar or tapioca starch properly. Stir constantly; plant milk sticks to the bottom of a pot and scorches more easily than dairy does.
Add the thickener while the milk is still hot, then let the mixture cool. If you’re using soy milk without a thickener, you can skip straight to cooling.
Cool the milk to 100–115°F before adding culture. Adding starter to milk that’s still too hot will kill the bacteria outright and the batch won’t ferment at all. A thermometer matters more here than most people expect guessing by touch is how a lot of otherwise careful batches fail at the last step.
Stir in the starter culture, then pour the mixture into your yogurt maker’s jars.
Let it ferment undisturbed for 8 to 12 hours. Plant-based batches generally run longer than dairy ones the fermentation is doing more structural work, especially with lower-protein milks.
Refrigerate for at least 4 hours before eating. Vegan yogurt firms up considerably in the fridge; a batch that looks thin straight out of the maker often sets up fine after chilling.
If you’re setting up a kitchen for regular plant-based cooking or fermenting, it’s worth looking at broader appliance choices too a dedicated nut milk maker can produce fresher, additive-free base milk than most store-bought cartons, which some home fermenters find gives more consistent results than commercial plant milk with stabilizers already mixed in.
Comparing Plant Milk Options
| Milk Type | Needs Thickener? | Typical Texture | Fermentation Time |
|---|---|---|---|
| Soy | Usually not | Closest to traditional yogurt | 6–10 hours |
| Coconut | Yes | Rich and creamy, thin without thickener | 8–12 hours |
| Oat | Yes | Mild flavor, slightly grainy | 8–14 hours |
| Cashew | Yes | Very creamy, best blended smooth first | 8–12 hours |
| Almond | Yes | Thin and watery without help | 10–14 hours |
Coconut milk deserves a separate note: full-fat canned coconut milk behaves very differently from carton-style coconut beverage. Canned coconut milk has enough natural fat to produce a genuinely rich, almost custard-like yogurt with a thickener, while the thinner carton version needs more help to avoid separating during fermentation.

For the best results, make cashew milk by soaking and blending raw cashews. Fresh cashew milk provides more fat and protein than most store-bought cartons, helping the yogurt culture create a creamier yogurt. Oat milk tends to be the most forgiving in terms of flavor, but also the most prone to a slightly slimy texture if the thickener ratio runs too high, so it’s worth starting on the lower end closer to 1 teaspoon per quart and adjusting upward in future batches rather than overcorrecting immediately.
Common Mistakes Beyond the Basics
Three mistakes show up repeatedly with first-time plant-based batches, beyond the pre-heating issue already covered.
Scorching the milk during the initial heat.
Plant milks are more prone to sticking and burning than dairy, especially oat and cashew milk, which have natural starches and fats that catch on the bottom of a pot. Medium-low heat with continuous stirring solves this and a heavy-bottomed saucepan makes a noticeable difference.
Opening the lid to check progress.
It’s tempting, especially on a first attempt, but plant-based cultures are more sensitive to temperature swings than dairy strains. Every time the lid comes off, the internal temperature drops, and repeated drops can stall or kill the fermentation entirely. Set a timer, walk away, and don’t open it until the full window has passed.
Using sweetened or flavored plant milk as the base.
Added sugars and stabilizers common in flavored cartons interfere with how the culture behaves, sometimes preventing proper setting altogether. Start with plain, unsweetened milk for the most reliable results, then add flavourings after the yogurt has finished fermenting and set properly.
This is also a good moment to mention that a lot of fermentation failures that seem like “bad luck” are actually one of these three issues compounding. Treat each step with care. Don’t scorch the milk, avoid opening the yogurt maker during fermentation, and use plain unsweetened milk. If you make several mistakes in one batch, you’ll struggle to identify what went wrong.
A fourth issue that’s less common but worth mentioning: using metal utensils or containers with reactive surfaces during fermentation. This matters more for plant-based batches than dairy ones, since some plant milks are slightly more acidic and can pick up a faint metallic taste over a long fermentation window. Glass or food-safe plastic containers, which most yogurt makers already use, avoid the issue entirely.
For a broader look at where kitchen projects like this tend to go sideways, this rundown of common kitchen mistakes covers several patterns that show up well beyond yogurt-making too.
Flavoring, Storage, and Reusing a Culture
Once a batch has set and chilled, flavoring is straightforward stir in fruit, sweetener, or vanilla after fermentation rather than before, since anything added beforehand can interfere with the culture. Make only the amount of vegan yogurt you can use within 7 to 10 days. It generally has a slightly shorter refrigerated shelf life than dairy yogurt, so smaller batches help reduce waste and keep every serving fresh.
Save a portion of each successful batch and use it as the starter culture for your next batch, just as many people do with dairy yogurt. This typically works for four or five generations before the culture weakens and results start to drift thinner texture, less tang at which point starting fresh with a new starter culture resets things.
Straining a finished batch through a cheesecloth or fine mesh strainer for a few hours produces a thicker, Greek-style texture, and it works just as well on plant-based yogurt as it does on dairy. Save the liquid that separates from your plant-based yogurt and use it in baking or smoothies instead of throwing it away. Although many people call it whey, it differs chemically from dairy whey.
If plant-based yogurt becomes a regular habit, it fits naturally into a weekly prep routine alongside other make-ahead basics; this list of meal prep ideas has some useful adjacent habits for building fermentation into a normal cooking week rather than treating it as a special project.
Nutritional Differences Worth Knowing
Vegan yogurt made at home doesn’t automatically match the protein content of dairy yogurt, and that’s worth knowing before relying on it as a direct nutritional substitute. Soy-based yogurt comes closest, typically landing in a similar protein range to regular yogurt. Almond and oat-based versions are considerably lower in protein unless extra protein is added deliberately, since the base milks themselves are lower in protein to begin with.
Homemade plant-based yogurt can rival or even outperform many store-bought yogurts in probiotic content. Manufacturers often pasteurise commercial yogurt after culturing to extend its shelf life, but that process destroys much of the beneficial live bacteria created during fermentation. A batch made at home and never heat-treated after fermentation keeps its live cultures intact.
Choosing Equipment for Plant-Based Batches
Not every yogurt maker handles the longer, more variable fermentation windows plant milk needs equally well. Basic on/off models with a single fixed timer work fine for dairy, where 6 to 8 hours is standard, but plant-based batches can run anywhere from 6 to 14 hours depending on the milk and thickener used. A model with adjustable timing removes the guesswork and avoids either underfermenting a batch or leaving it running long past when it’s needed.
Jar material is a smaller but genuinely relevant factor too. Glass jars hold temperature more evenly than thin plastic ones and don’t pick up odors between batches, which matters more with plant-based fermentation since some bases (oat especially) can leave a lingering smell in porous plastic over repeated use.
This yogurt maker buying guide breaks down which models offer that flexibility, and this companion piece on machines built specifically with probiotic results in mind is worth a look if culture health and consistency matter more to you than convenience features.
FAQs
Does the yogurt maker need to be a specific type for vegan yogurt?
No. Any model that holds a stable low temperature for an extended period will work. Adjustable-timer models are more convenient, since plant-based batches often need longer than the fixed windows built into basic machines.
Why did my vegan yogurt turn out runny?
Almost always a missing or insufficient thickener, or a milk with too little natural protein almond and thin oat milk are common culprits. Switching to soy, or adding a proper dose of agar or tapioca starch, usually fixes it.
Can I reuse a batch of vegan yogurt as the starter for my next batch?
Yes, for roughly four to five generations, similar to how dairy yogurt starters get reused. After that, the culture typically weakens and results start to drift, so restarting with a fresh starter periodically keeps quality consistent.
Is store-bought vegan yogurt a reliable starter?
Only if the label confirms live active cultures. Some brands pasteurize after culturing to extend shelf life, which kills the bacteria needed to start a new batch check the label before relying on it as a starter.
How do I tell if a batch has actually spoiled versus just needing more time?
A sour, alcohol-like, or distinctly off smell means it’s spoiled and should be discarded. A mild tang with a still-thin texture usually just needs more fermentation time or a longer chill in the fridge before final judgment.