
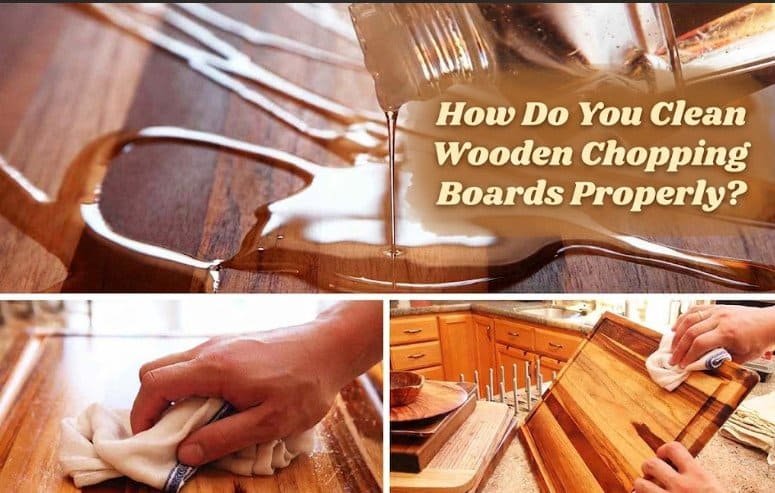
A familiar routine plays out in plenty of chopping boards after processing raw meat: rinse the blood and food scraps off the cutting board, wipe it a couple of times while leaning it against the edge of the sink, then put it away in a cabinet. Very few people realize this entire sequence is wrong for a wooden cutting board, start to finish.
Making matters worse, most cutting board cleaning advice circulating online mixes up the properties of different materials entirely, and reinforces a decades-old misconception along the way: that wooden boards are inherently less hygienic than plastic ones. Food science research out of institutions including UC Davis corrects that. Wood has natural antibacterial properties. Its porous structure gradually dehydrates and suppresses bacterial reproduction, while the tiny pores in plastic boards trap food residue and become a breeding ground for bacteria instead.
WOOD VS. PLASTIC: WHAT THE HYGIENE MYTH GETS WRONG
This isn’t a call to avoid plastic cutting boards altogether. A board’s actual hygiene has almost nothing to do with its base material, and everything to do with whether post-use care happens correctly. Three cleaning mistakes cause most of the damage seen on wooden boards specifically:
Running a wooden board through a high-heat dishwasher cycle causes the wood to crack, and those cracks become gaps where bacteria can settle in permanently. Soaking a board in water for extended periods carries bacteria deep into the wood’s interior rather than washing it away. And laying a board flat on the countertop right after washing traps moisture underneath, which keeps it from ever drying fully.

THE RIGHT CLEANING METHOD FOR EACH USE CASE
Correct cleaning differs depending on what the board was just used for. For ready-to-eat ingredients like fruit, vegetables, and bread, a simple wash with mild dish soap and warm water is enough, followed by standing the board upright on a dish rack to dry completely.
If the board has handled raw meat, poultry, fish, or anything leaving raw residue behind, scrape off remaining scraps first, then wipe it down with a solution of dish soap, water, and a small amount of white vinegar. Rinse thoroughly and, again, stand it upright to air dry rather than laying it flat. This is the only approach that actually eliminates bacterial residue at the source rather than just moving it around.
DEEP CLEANING AND STERILIZATION WHEN A BOARD NEEDS MORE
Stubborn bacteria that ordinary soap can’t touch respond well to a mixture of a tablespoon of white vinegar, coarse salt, and half a lemon wiped across the surface. For deeper disinfection, a solution of one tablespoon of bleach per gallon of water works, applied briefly and rinsed off completely afterward. Residual bleach solution should never be left sitting on the board.
A prevention habit worth emphasizing before any of this: using separate cutting boards for raw meat and for produce outperforms any post-use cleaning method available. No amount of scrubbing after the fact matches the protective effect of never cross-contaminating the board in the first place. Anyone building out a kitchen prep setup around this principle might find Dtdf Home and Kitchen’s list of essential kitchen safety tips useful for the broader picture beyond just cutting boards.
WHY DRYING MATTERS MORE THAN THE WASH ITSELF
After washing, a cutting board needs to dry the right way, not just get set somewhere to dry eventually. It can’t be laid flat and stacked with other boards on the counter. It needs to stand upright so air can actually circulate around it. Drying time shifts with ambient temperature and humidity too, a board in a cold, damp kitchen takes noticeably longer to dry than one in a warm, dry space, and that difference matters more than most people assume.
MONTHLY OILING AND LONG-TERM CARE
Daily cleaning alone isn’t enough to extend a board’s service life. Food-grade mineral oil applied once a month, wiped evenly with a soft cloth and left to sit overnight, locks in moisture and prevents cracking. A beeswax-based care product can further seal the surface and reduce moisture loss on top of that.
One rule worth being strict about: cooking oils that go rancid easily, olive oil chief among them, are off the table here. They leave behind a persistent, hard-to-remove odor that no amount of washing seems to fully clear.
A properly maintained wooden board outlasts the combined lifespan of several plastic boards, which makes it a genuinely worthwhile long-term investment rather than a fussier alternative. It’s also worth thinking about where that board lives when it’s not in use. Poorly ventilated cabinets can undo some of the drying work described above, and Dtdf Home and Kitchen’s broader look at common kitchen mistakes covers a few storage habits that quietly work against board longevity without anyone noticing.
WHY BOARDS FAIL YEARS EARLY
The vast majority of kitchen safety mistakes come from small, repeated shortcuts taken over long stretches of time, not one-off accidents. Plenty of people assume a small, isolated mistake here or there won’t cause real damage, but those mistakes accumulate. A board that should last 10 years can end up needing replacement after just 2, and the pattern behind that failure is consistent across reader reports.
After sorting through recurring reader questions, the core cause of premature board failure turns out not to be the cleaning process most people fixate on, but incorrect air-drying habits specifically. Testing backs this up directly: boards that meet three standards (correct cleaning after every use, upright air-drying, and monthly oiling) outperform pricier boards made from premium wood or special coatings that get improper maintenance, both in daily performance and overall lifespan. The upshot is straightforward. A proper maintenance routine matters more than the price tag on the board itself. Readers concerned about how cutting board habits connect to broader injury risk in the kitchen can also look at Dtdf Home and Kitchen’s rundown of the most common kitchen injuries and how to prevent them, since board condition and knife safety tend to go hand in hand.
FREQUENTLY ASKED QUESTIONS
Does using dish soap dry out a wooden cutting board?
No, not in ordinary daily use. Dehydration and cracking almost always trace back to skipping the monthly oiling step, not to the dish soap itself.
How do you get rid of stubborn onion, garlic, or ginger smell?
Rub half a lemon mixed with coarse salt over the surface, then rinse. If any odor lingers after that, a baking soda paste applied a second time usually finishes the job.
Is it actually safe to use one board for both raw meat and produce?
Washing thoroughly with hot soapy water mixed with vinegar or salt between uses makes it technically safe, but most households still keep separate boards anyway, simply to remove the risk of forgetting that step in the middle of cooking.
Are deep grooves from repeated cutting a sign the board needs replacing?
No, that’s normal wear. Sanding the grooves down with fine-grit sandpaper and re-oiling the surface fixes it without needing a full replacement.
How long should a well-maintained wooden cutting board actually last?
A high-quality hardwood board with proper care can last more than 10 years, and typically only needs replacing once full-depth, irreparably dirty cracks show up across the surface.
Anyone setting up a full kitchen workflow around this routine can pair this guide with Dtdf Home and Kitchen’s knife block and storage guide, since board care and knife care tend to work best when planned together rather than as separate afterthoughts.