

These tips for making better homemade yogurt will help you achieve thicker, creamier and more consistent results. A batch of homemade yogurt comes out watery and thin more often than most people expect. This happens even when you’ve followed the recipe to the letter.Warm the milk to the correct temperature and use a fresh starter culture. Yet the result still sits in the fridge looking more like buttermilk than thick, tangy yogurt. Usually the problem isn’t the recipe. Add a few simple habits to your routine that many basic yogurt-making guides never mention.
According to the USDA FoodData Central, whole milk contains more fat than reduced-fat milk, which contributes to a creamier yogurt texture.
Homemade yogurt has an odd kind of fault tolerance. Some conditions are strict, and getting them wrong ruins the batch no matter what else goes right. Other details have a wide margin for error, and a small mistake there barely matters if the fermentation window is long enough to compensate. The ten tips below start with the techniques that make the biggest difference, then move on to simple habits that help you produce consistently better yogurt over time.
None of this requires special training or expensive lab equipment. It comes down to four things done in the right order: choosing the right milk, hitting two specific temperatures at the right moments, using a starter that’s actually alive, and then leaving the batch alone long enough for the culture to finish its work. Everything past that point is refinement rather than necessity.
1. Choose the Best Milk for Homemade Yogurt
Whole milk produces thicker, creamier yogurt than reduced-fat versions. The difference is noticeable enough that it’s worth choosing deliberately instead of by habit. Fat provides much of yogurt’s body and mouthfeel. Skim or 1% milk usually needs extra help, such as straining or adding milk powder, to achieve a similar texture.
Ultra-pasteurized milk (labeled “UHT” on the carton) can also cause problems. High-heat processing changes the milk proteins. Choose regular pasteurised milk for the best results. Even if you follow every step correctly, UHT milk often produces yogurt with a less predictable texture and consistency.
Raw milk is a separate case. Always heat UHT milk to the same target temperature as regular pasteurised milk before adding the starter culture. Even though the manufacturer has already processed the milk, the proteins still need this heat treatment to produce good yogurt. Skipping that step with raw milk isn’t a shortcut worth taking.
For anyone using lower-fat milk by necessity rather than choice, stirring in two to three tablespoons of powdered milk per quart before heating adds back protein without adding fat, which noticeably firms up the final texture. It’s a small trick, but it closes most of the gap between skim milk yogurt and whole milk yogurt without changing the nutritional profile people are usually trying to maintain in the first place.
2. Heat the Milk to 180°F Before Cooling It Down
Many people skip this step because they think warming the milk to incubation temperature is enough. In reality, properly heating the milk first helps create thicker, more consistent yogurt. It isn’t. Heating milk to around 180°F (82°C) denatures the whey proteins. This helps the finished yogurt form a stable gel instead of separating into loose curds and watery whey.

Skip this step and the yogurt might still technically set. But it tends to come out thin, occasionally grainy, and prone to weeping liquid within a day or two in the fridge. It’s the single most common reason a batch fails to thicken properly, more common than problems with the starter culture itself.
A heavy-bottomed pot helps here, since thin pots scorch milk quickly at this temperature and a scorched pot bottom means burnt flavor carried through the whole batch. Stirring occasionally as the milk approaches 180°F prevents a skin from forming on top and keeps the heat distributing evenly.
3. Cool to Body Temperature Before Adding the Culture
Once the milk reaches 180°F, let it cool to 110–115°F (43–46°C). Only then should you add the starter culture. Adding culture to milk that’s still too hot kills the bacteria outright, and there’s no recovering from that; the batch simply won’t ferment. If the milk is too cool, the culture activates much more slowly. That gives unwanted bacteria more time to grow and can affect both flavour and food safety.
A kitchen thermometer removes the guesswork here. Use a thermometer instead of depending solely on the wrist test. Feeling the milk against the inside of your wrist can provide a rough estimate, but it isn’t accurate enough for a batch you’ve spent nearly an hour preparing. Setting the pot in a sink of cold water speeds up the cooling stage considerably, cutting what can otherwise be a 45-minute wait down to 15 or 20 minutes.
4. Use a Starter With Live, Active Cultures
Not every plain yogurt still contains live, active cultures by the time you buy it. Even products that appear suitable may not contain enough active bacteria. Checking for “live and active cultures” specifically on the label, rather than just “contains probiotics,” makes a real difference in how reliably a batch sets. Some manufacturers heat-treat probiotic products after culturing, which can reduce or eliminate many of the live bacteria created during fermentation. That process kills the bacteria needed to start a new batch.
A small amount goes a long way. Two to three tablespoons of starter per quart of milk is typically plenty. More isn’t better here, and overloading the milk with starter doesn’t speed up fermentation meaningfully; it mostly just uses up starter faster than necessary. A starter that’s more than a week or two old tends to produce weaker results as the bacterial count declines over time, so freshness matters more than most people assume when buying a starter specifically for this purpose.
Research published by the National Center for Biotechnology Information (NCBI) explains how lactic acid bacteria ferment milk into yogurt.
Quick Reference: Common Yogurt Problems and Likely Causes
| Symptom | Most Likely Cause |
|---|---|
| Thin, runny texture | Milk not heated to 180°F before culturing |
| Grainy texture | Milk heated too fast, or culture added while still too hot |
| No set at all | Culture added to milk that was too hot, killing the bacteria |
| Overly sour taste | Incubated too long, or at too high a temperature |
| Watery liquid on top | Normal whey separation, not typically a problem |
5. Keep the Right Temperature for Homemade Yogurt
Yogurt cultures work best between 110°F and 115°F (43–46°C). Temperatures outside this range can slow or disrupt fermentation. An oven with just the interior light turned on, a low-temperature dehydrator, or a dedicated yogurt maker all tend to hold a steadier temperature than a towel-wrapped jar left on a countertop, which cools unevenly depending on the room, the season, and even how often a door opens nearby.
This is one area where a dedicated appliance earns its keep. A yogurt maker built for this exact purpose tends to produce far more consistent results than makeshift methods, since it’s designed to hold a fixed temperature for the entire incubation window without drifting. dtdf home and kitchen’s roundup of the best yogurt makers is worth a look for anyone weighing whether the appliance is worth adding to the counter.
An insulated cooler with warm water bottles can work well if you don’t want to buy another appliance yet. It won’t hold temperature as tightly as a purpose-built machine, but it beats a towel on the counter by a wide margin, and it’s already sitting in most garages unused for most of the year.
6. Don’t Disturb the Batch While It’s Culturing
Shaking, stirring, or moving the container during incubation disrupts the protein structure as it forms, which shows up later as a looser, less cohesive texture. It’s tempting to check on progress by giving the jar a little shake or lifting the lid to peek. That single habit alone accounts for a surprising number of “why is my yogurt thin” questions from people who otherwise followed every other step correctly.
Set a timer, leave the batch alone, and check only once the incubation window has fully passed. Most recipes call for somewhere between six and twelve hours, with longer times producing a tangier result.
Scientific research available through the National Center for Biotechnology Information (NCBI) explains how lactic acid bacteria convert lactose into lactic acid during yogurt fermentation.
7. Strain It If Greek-Style Yogurt Is the Goal
Regular homemade yogurt and Greek yogurt start from the exact same process. The difference is what happens afterward. Straining the finished yogurt through a fine cloth or a coffee filter set over a bowl for a few hours, or longer in the fridge overnight, removes much of the whey and leaves behind a thicker, tangier result closer to store-bought Greek yogurt.
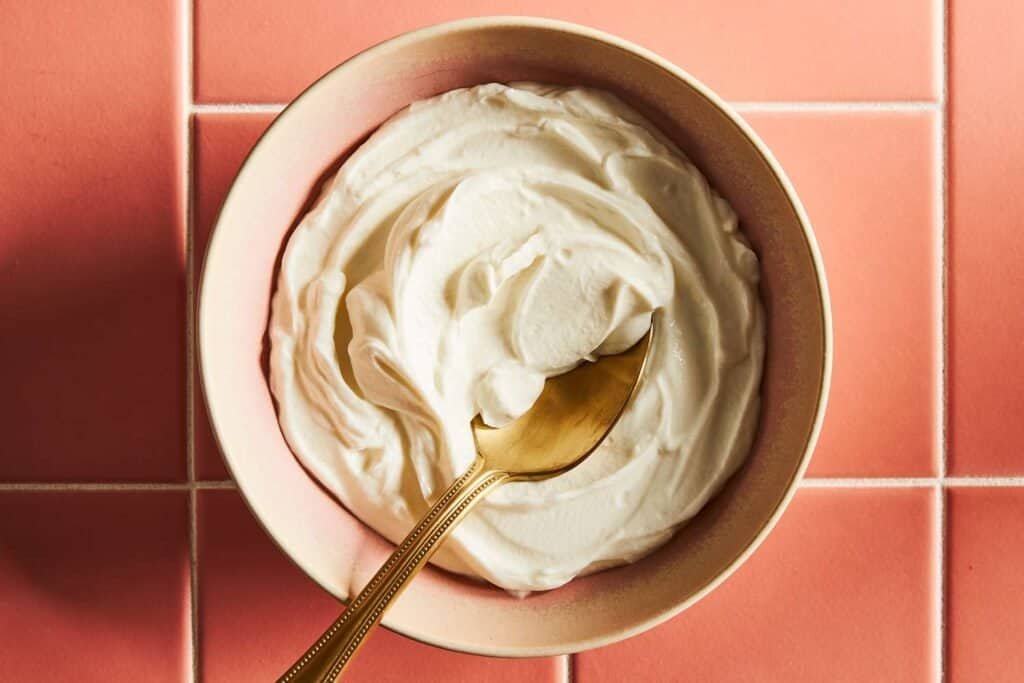
The strained-off whey isn’t waste, either. It works well in smoothies, bread dough, or as a substitute for some of the liquid in pancake batter, and it carries a mild tang that can actually improve the flavor of baked goods rather than detracting from it.
8. Store Homemade Yogurt Properly
Homemade yogurt lacks the stabilizers and preservatives found in most commercial versions, so storage matters more than people expect. An airtight container keeps out fridge odors and slows moisture loss, and this is one spot where the right food storage containers make a genuine difference rather than being a minor convenience.
It’s also worth knowing which foods shouldn’t sit next to yogurt in the fridge, since strong-smelling items nearby can affect its flavor faster than most people realize. A quick read through what foods should never be stored together covers more of these pairings, and a surprising number of them involve dairy.
Glass containers hold up better than plastic over repeated use, since plastic tends to absorb odors permanently after enough cycles through the dishwasher, and a container that smells faintly of last month’s curry isn’t doing any favors for a fresh batch of yogurt. It’s a minor detail, but it’s the kind of thing that quietly affects flavor without anyone tracing the cause back to the container itself.
Good food hygiene is essential when making homemade yogurt. The Food Standards Agency provides guidance on cleaning, chilling and preventing cross-contamination
9. Save Some of Each Batch as the Next Starter
A small amount of finished yogurt, roughly two to three tablespoons per quart, can be used to start the next batch instead of buying new starter culture each time. This works for several generations before the culture starts to weaken, at which point it’s worth introducing a fresh starter again. Most experienced home yogurt makers cycle through a fresh starter every month or so, more often if the batches start coming out noticeably softer than usual.
And here’s where people usually go wrong: they keep reusing the same starter for months on end without noticing the slow decline in texture, then assume something else in the process, like the milk brand or the incubator, has gone wrong. The culture itself is almost always the quieter explanation.
10. Consider the Right Equipment for Consistency
A lot of the troubleshooting above becomes far less necessary with the right tools on hand. A reliable thermometer solves the temperature guessing entirely. A dedicated yogurt maker solves the incubation consistency problem in one step. And good food storage keeps the finished product tasting right for longer than it otherwise would.
None of this needs to be expensive or complicated. dtdf home and kitchen has covered specific yogurt maker options built for probiotic-rich results in more depth for anyone deciding whether the investment makes sense for how often they actually cook. As a general rule, anyone making yogurt more than once a month tends to recoup the cost of the appliance fairly quickly, simply by avoiding failed batches.
Homemade yogurt made dairy-free is a slightly different process with its own equipment considerations, since nut milks ferment differently than dairy milk does. Anyone going that route should look at nut milk makers built for dairy-free drinks separately rather than assuming the same dairy setup will work without adjustment.
It’s worth resisting the urge to buy every accessory at once, though. A thermometer and a reliable incubation method cover the two conditions that actually determine success or failure. Everything else, from specialty jars to flavor mix-in kits, is a nice-to-have that can wait until the basic process is second nature. Building the habit first and the equipment collection second tends to produce better cooks than the reverse.
Most of the trial and error in homemade yogurt comes down to temperature control and patience, more than any specific brand of starter or type of milk. Once the 180°F heating step and the steady incubation window become second nature, the rest tends to fall into place on its own. The first few batches might come out inconsistent, and that’s normal. It’s usually fixed by one of the ten things above rather than a wholesale change in method or a switch to a different recipe entirely.
FAQs
Why did my yogurt separate into curds and watery liquid?
Some whey separation on top is normal, especially after a few days in the fridge, and can just be stirred back in or drained off. If the separation is severe and the yogurt itself is thin and lumpy rather than smooth, the milk likely wasn’t heated to 180°F before culturing.
Can I use ultra-pasteurized (UHT) milk?
It’s possible but not ideal. UHT milk has already been heated to a much higher temperature during processing, which can affect how well it sets. Regular pasteurized milk generally gives more reliable, repeatable results across batches.
How long does homemade yogurt actually keep in the fridge?
Typically one to two weeks in an airtight container, though the tartness will increase over time as the cultures continue working slowly even at fridge temperatures. If it develops mold, an off smell beyond normal tanginess, or a strange color, it’s time to toss it.
Why is my homemade yogurt too sour?
Incubating for too long, or at too high a temperature, produces more sour, tangy yogurt as the bacteria continue converting lactose into lactic acid. Shortening the incubation window by an hour or two on the next batch usually fixes this without changing anything else.
Do I need a dedicated yogurt maker, or can I use my oven?
An oven with the interior light left on can work for many people, but it’s less consistent than a dedicated yogurt maker, especially in kitchens where the oven doesn’t hold a steady low temperature. For occasional batches, the oven method is usually sufficient. If you make yogurt every week, a dedicated yogurt maker is often the better investment because it maintains a more consistent fermentation temperature and reduces the risk of failed batches.
Need help choosing one? Explore DTDF Home & Kitchen’s guide to the best yogurt makers to compare models that deliver reliable, consistent results.