
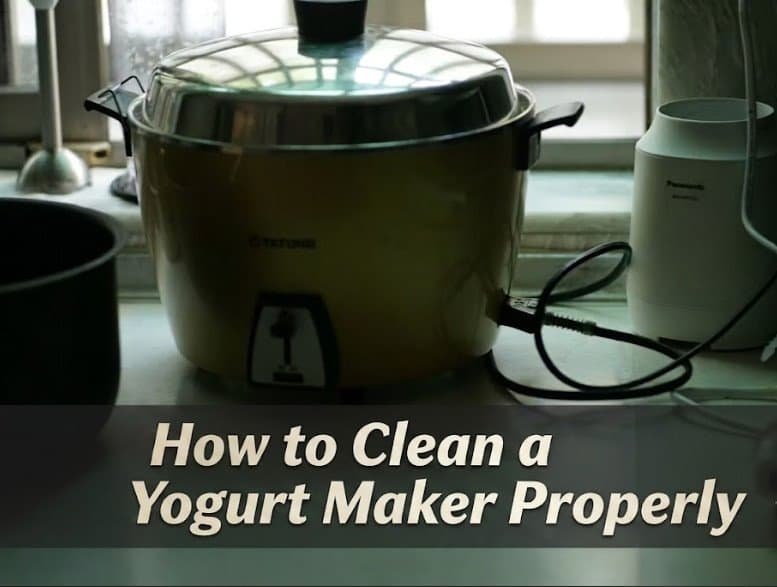
Many household yogurt maker owners mistakenly believe that a faint sour smell after washing means something has gone wrong with the machine. What makes this worse is that most people clean a yogurt maker the same way they’d clean an ordinary drinking cup, and that approach simply does not hold up. Clean your yogurt maker as carefully as you would an infant’s baby bottle. Thorough cleaning helps prevent the repeated batch failures that many home yogurt makers discuss in online communities.
Why Live Cultures Are Less Forgiving Than People Assume
There’s an assumption baked into a lot of home yogurt-making advice: that the active bacterial cultures used for fermentation are tough enough to shrug off a little leftover residue. In practice, that’s not how it works. Hard-to-spot residue, clinging to the inner tank walls, dried milk protein wedged into the gaps of the lid seal, condensation pooling at the base of the unit, gives unwanted contaminant bacteria a foothold. And once that foothold exists, those bacteria multiply fast during the 6 to 12 hour window a batch spends sitting at a constant warm temperature. The result shows up in the final product as a runny texture, souring that happens too quickly, or yogurt that never solidifies at all.
At dtdf home and kitchen, the editorial team ran side-by-side cleaning tests across several of the most popular household yogurt maker models over multiple weeks, and the pattern held consistently. Ordinary kitchen appliances only need food residue removed. A yogurt maker needs food residue and biological residue removed, because the whole point of the device is to hold a suitable temperature and humidity environment where live bacteria can multiply. That’s a fundamentally different cleaning job.
The single biggest mistake, the one responsible for most repeated cleaning failures, is that people wipe down the outer casing of the base unit and stop there, while the micro-level caked milk protein sitting in the gaps of the inner tank walls goes completely untouched.
For more information on safe kitchen hygiene, see the Food Standards Agency’s food hygiene guidance.
The Mandatory Step-by-Step for Cleaning Jars and Lids
This routine needs to happen after every single batch, not “later that evening” or “next time I use it.”
- Pour out all residual liquid immediately after use. Waiting lets milk protein cool and solidify onto the glass, which turns a two-minute rinse into a much longer scrubbing job.
- Never use a hard steel wool scrubber on the inner walls. Some tanks carry a light antibacterial coating that steel wool will scrape away, and even on plain glass it creates micro-scratches that make future residue stick more easily.
- Use a soft-bristled bottle brush sized to fit narrow-mouthed jars, and work it into the hard-to-reach spots, particularly the groove inside the lid seal and the seam where the tank meets its opening. These two spots hold onto more leftover protein than the flat surfaces do.
- Rinse every part completely, then disinfect in boiling water for about 5 minutes.
- No dish soap residue should remain anywhere on the parts. Leftover soap can interfere with or outright kill the active fermentation bacteria you add for the next batch, which is a different risk than the usual “soap affects taste” concern people are more familiar with.
- Air dry upside down on a rack. Towel drying risks reintroducing lint or bacteria from the cloth itself.
A bottle brush built for narrow jars is worth having on hand specifically for this job, and it pairs well with the rest of a basic cleaning kit covered in the must-have kitchen cleaning tools guide.
How to Deep Clean a Yogurt Maker
We’ll break this down in more detail here, since it’s the part the vast majority of users skip entirely.Keep the electric base dry at all times. Clean it with a damp cloth only, and never submerge it in water. Most people know that much. What they don’t do is clean the interior tray at all, beyond wiping the outer casing where it’s visible.
Condensation collects underneath the jars during every incubation cycle. Combine that with the occasional milk spill during transfer, and over weeks or months a thin, sticky, milky-white residue film builds up on the tray surface where the jars sit. Check the yogurt maker carefully after every batch. A thin film of dried whey and milk protein can build up on the surfaces, but many people miss it because it’s difficult to see.

The correct treatment: unplug the unit, then soak or wipe the tray with warm water (around 30°C) mixed with a teaspoon of ordinary baking soda, letting it sit for about 15 minutes before gently working it loose with a soft scouring pad, never a hard brush. Hard scrubbing on this tray leaves fine scratches that actually make it easier for residue to accumulate the next time around, which defeats the purpose. This baking soda approach follows the same safe-proportion logic covered in the site’s guide on removing stubborn stains from cookware, which keeps chemical residue from ending up anywhere near future batches.
Do this every one to two weeks with regular use, and dry the tray completely before the next cycle.
You can also follow the CDC’s cleaning and sanitising guidelines to maintain good food safety practices.
Two Problems Users Ask About Most: Persistent Odor and Cloudy Buildup
These two questions come up more than any others, and there’s a cognitive mistake behind both of them that around 90 percent of users seem to make.
For persistent odor, the first instinct most people have is to assume the tank itself needs replacing. That’s usually wrong. The real source is the removable, slightly porous rubber or silicone sealing gasket on the lid. Clean the sealing gasket separately after every use. It absorbs acidic odours during fermentation, so simply wiping the rest of the yogurt maker won’t remove the smell. Wash the gasket thoroughly, let it air-dry completely, and then reinstall it. A gasket that goes back on even slightly damp will trap moisture and undo the whole effort.
Inspect the inner walls regularly. Hard water minerals and leftover protein film usually create the cloudy or foggy buildup you see over time. A 20 to 30 minute soak in warm water with a tablespoon of baking soda before the normal wash clears most of it, particularly in areas where tap water runs hard.
Here’s a quick-reference table for cross-checking the most common issues:
| Symptom | Likely Cause | Fix |
|---|---|---|
| Faint sour smell that returns after washing | Gasket retaining acidic odor | Remove gasket, wash separately, air-dry fully before reinstalling |
| Cloudy or foggy glass jars | Mineral deposits and protein film | Baking soda soak, 20-30 minutes |
| Sticky milky-white film under jars | Condensation and whey buildup on tray | Baking soda wipe, base unpowered and fully dry after |
| Yogurt tastes off or ferments unevenly | Soap residue not fully rinsed | Extend rinse time, skip scented dish soap entirely |
| Mold spots forming on the lid | Stored while still damp or sealed too soon | Air dry fully before storing, never seal while wet |
Quick Cleaning vs. Deep Cleaning: How Often Should You Clean a Yogurt Maker?
The quick clean (jars, lid, standard wash and rinse) has to happen after every batch without exception. There’s no version of consistent yogurt-making where this step gets skipped.
Deep cleaning frequency depends on how often the machine is used. For general users making yogurt once or twice a week, a deep clean, meaning the full base unit wipe-down plus a baking soda soak for any cloudy jars, should happen every two weeks. For high-frequency users making yogurt three or more times a week, that same deep clean should happen weekly. Deep-clean your yogurt maker before making your next batch if it has been unused for two to three weeks or longer. Even if it looks perfectly clean in the cupboard, a thorough clean helps ensure the best results.Dust settles and dormant bacteria can reactivate in ways that aren’t visible, and skipping this step is a common reason a “perfectly good” machine suddenly produces a failed batch after a break.
Dishwasher use deserves its own note here. Most glass jars are dishwasher-safe, but always check the manufacturer’s manual for your specific model first, since some plastic components can warp under high-heat cycles even when the glass itself handles it fine. Hand-washing remains the safer default whenever there’s any uncertainty.
How to Store a Yogurt Maker After Cleaning: Avoiding the Most Common Mistake
Never seal the lid onto a jar, or close up the main unit’s base, while there’s still slight moisture present. This is, by a wide margin, the mistake people make most often, usually because they’re in a hurry to put everything away after a long day.
Instead, leave the lid off or loosely set on top and let every part air-dry completely, which typically takes a few hours. If cupboard space allows, store the jar and lid separately so air can circulate around the sealing gasket specifically, since that airflow is what actually prevents the musty smell problem covered earlier. Anyone working with a tighter kitchen footprint can look at the site’s kitchen storage ideas piece for setups that work well for appliance parts that need to breathe between uses rather than sitting sealed in a drawer.
Following a standardized cleaning routine costs very little. Spending roughly five extra minutes beyond a quick rinse is usually all it takes to keep every batch consistent and avoid the grainy, failed results that send people searching for what went wrong. Once cleaning becomes the final step of making yogurt rather than a separate chore tacked on afterward, it stops feeling like extra work at all.
Frequently Asked Questions
Can the yogurt maker’s jars go in the dishwasher?
Even when the glass jar itself is dishwasher-safe, some lids and their sealing gaskets aren’t heat-resistant enough for a dishwasher cycle. Check the manual for your specific model before assuming it’s fine.
Why is there still a sour smell after I’ve washed everything?
The rubber or silicone gasket on the lid is almost always the source. It needs to be washed on its own and allowed to dry completely before it goes back on, rather than being wiped down while still attached to the lid.
Is it safe to clean the unit with bleach?
This is better avoided. The porous gasket material is very difficult to rinse completely free of bleach residue, and any leftover trace can affect future fermentation. A diluted vinegar solution handles odor and basic disinfecting without that risk.
How often should the jars or lids be replaced?
A glass jar can last for years with reasonable care. Replace the lids and rubber gaskets every one to two years with regular use. If they become stiff, crack, or continue to hold odours after cleaning, replace them sooner.
Can the electric heating base be washed with water?
No, this should never happen. The base houses the heating element and must never be submerged or rinsed directly. Unplug it first, wipe the interior tray with a barely damp cloth, and let it dry fully before running another batch.
For anyone still deciding between models, the site’s in-depth breakdown of the best yogurt makers and the companion guide to yogurt makers built for probiotic-rich snacks are both worth a read before buying. Jar shape and gasket design end up mattering a lot more for long-term cleaning ease than most people expect going in.